Seller Payment Settings
One of our most proudest features of BitLift is the ability for sellers to get paid directly from their customers in crypto. The payment goes directly from the customer’s wallet to yours. No middle men, no fees, simply peer-to-peer crypto – the way it should be!
We’ve experimented with every crypto payment system under the sun and we had a few requirements when it came to selecting the right system for crypto payment processing:
- It needs to be a non-custodial wallet. This means you hodl and are responsible for the security of the crypto you receive.
- It should be 100% free. The days of paying credit card transaction fees are over!
- It should allow you to accept payment in multiple cryptocurrencies
- It’s gotta be easy – crypto is confusing enough as it is
With these requirements in mind we selected Coinbase Commerce as the first payment integration partner at BitLift. Here are detailed instructions for creating a Coinbase Commerce account.
Connecting your BitLift Seller Profile to Coinbase Commerce
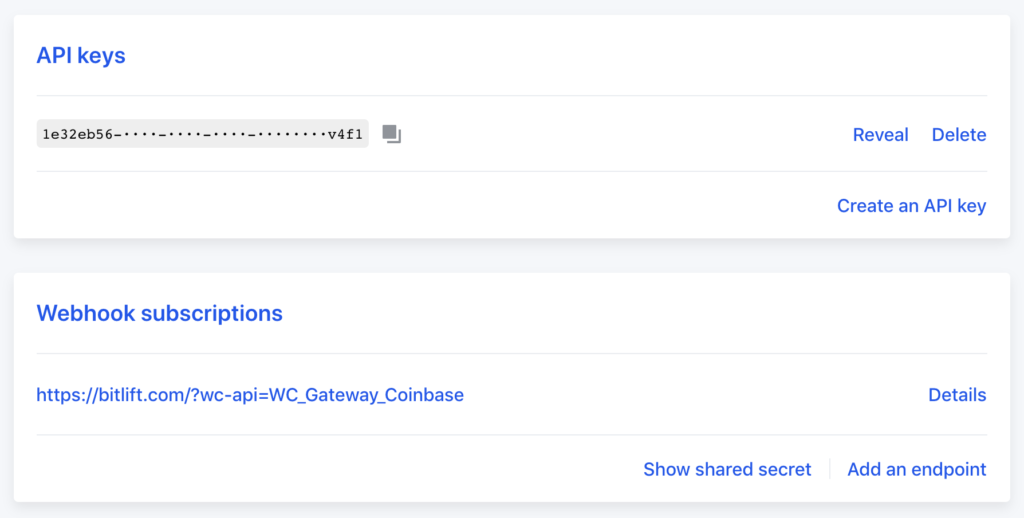
Once you’ve created a (new) Coinbase Commerce account, there are three important steps to connect your Coinbase Commerce account to BitLift:
- On the Coinbase Commerce Settings page click “Create An API Key” and then copy/paste the key into your BitLift Seller Payment Settings page
- On the Coinbase Commerce Settings page click “Add An Endpoint” and then enter this url:
https://staging.bitlift.com/?wc-api=WC_Gateway_Coinbase - After adding the BitLift endpoint to Coinbase Commerce, click “Show Shared Secret” and copy/paste the Webhook Shared Secret into your BitLift Seller Payment Settings page
- Click “Update Settings” on your Payment Settings page and you’re all set!
Searched everywhere and still can't find the answer?
Contact BitLift